How To Install and Layout Furring Strips
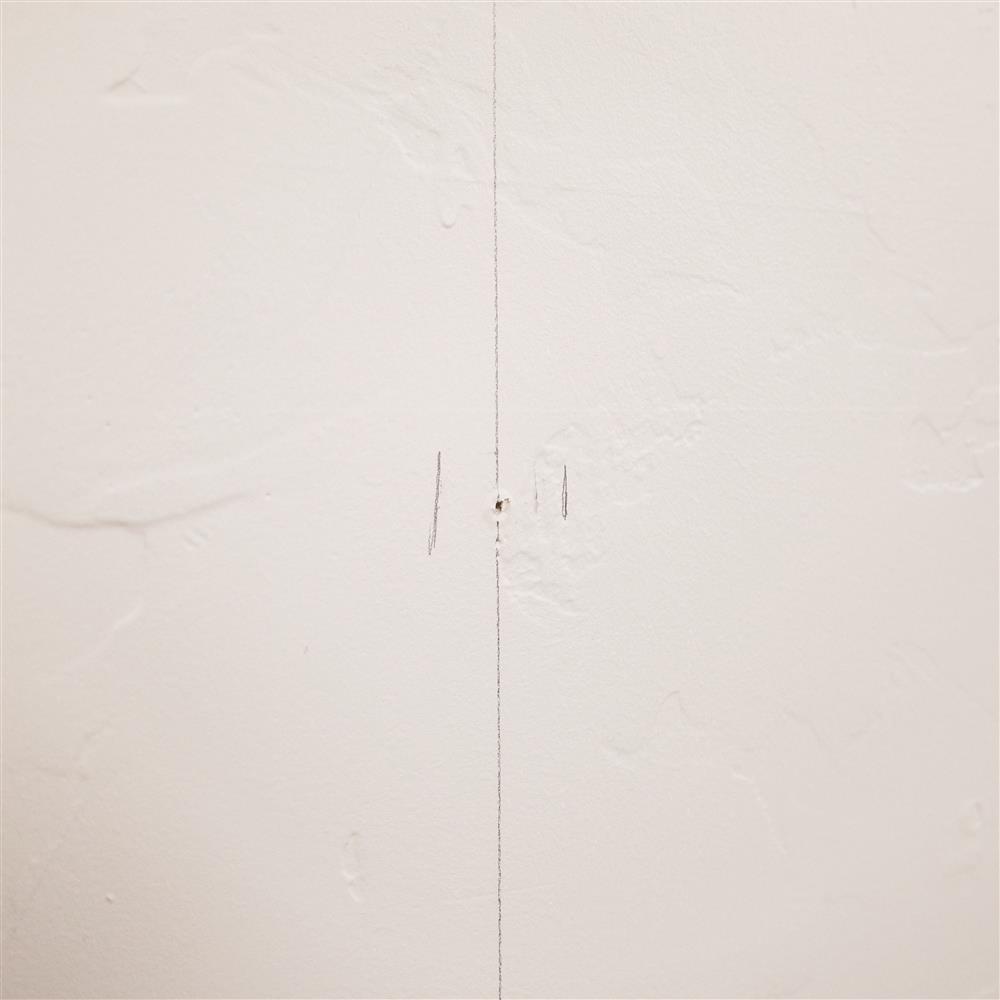
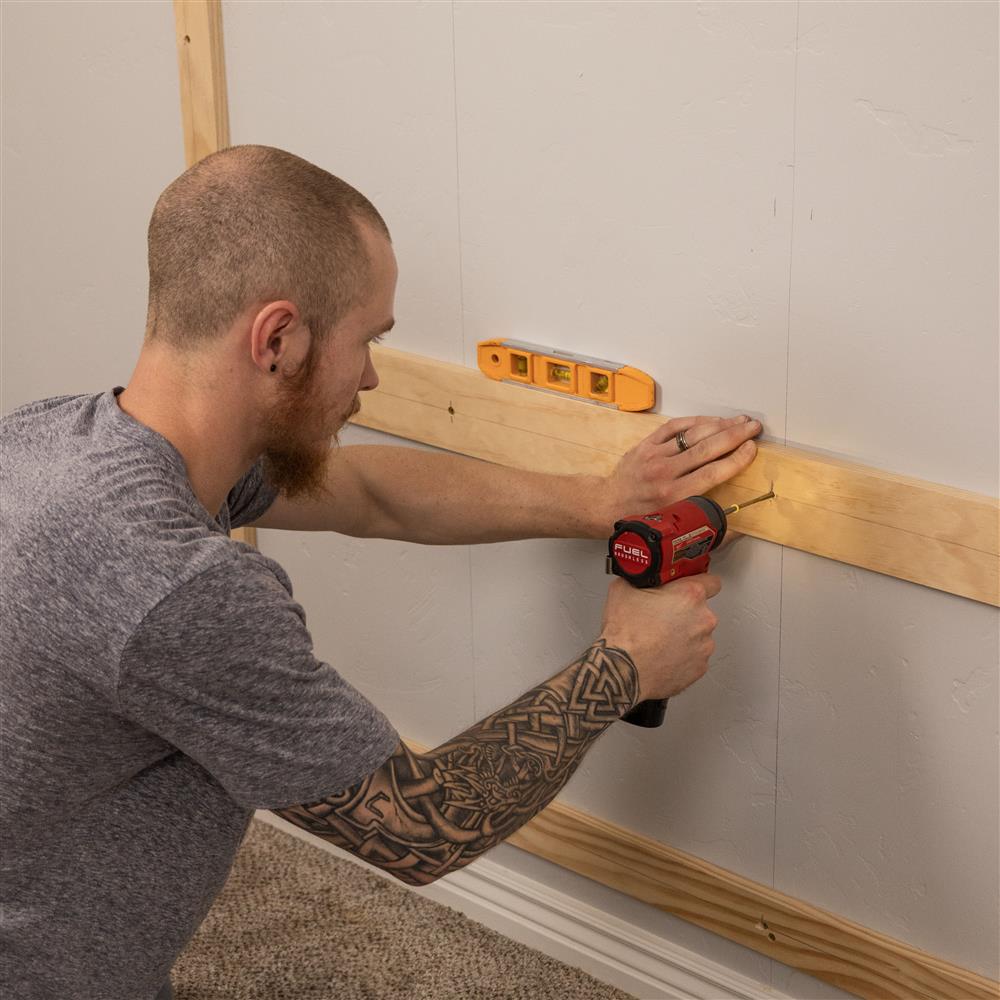
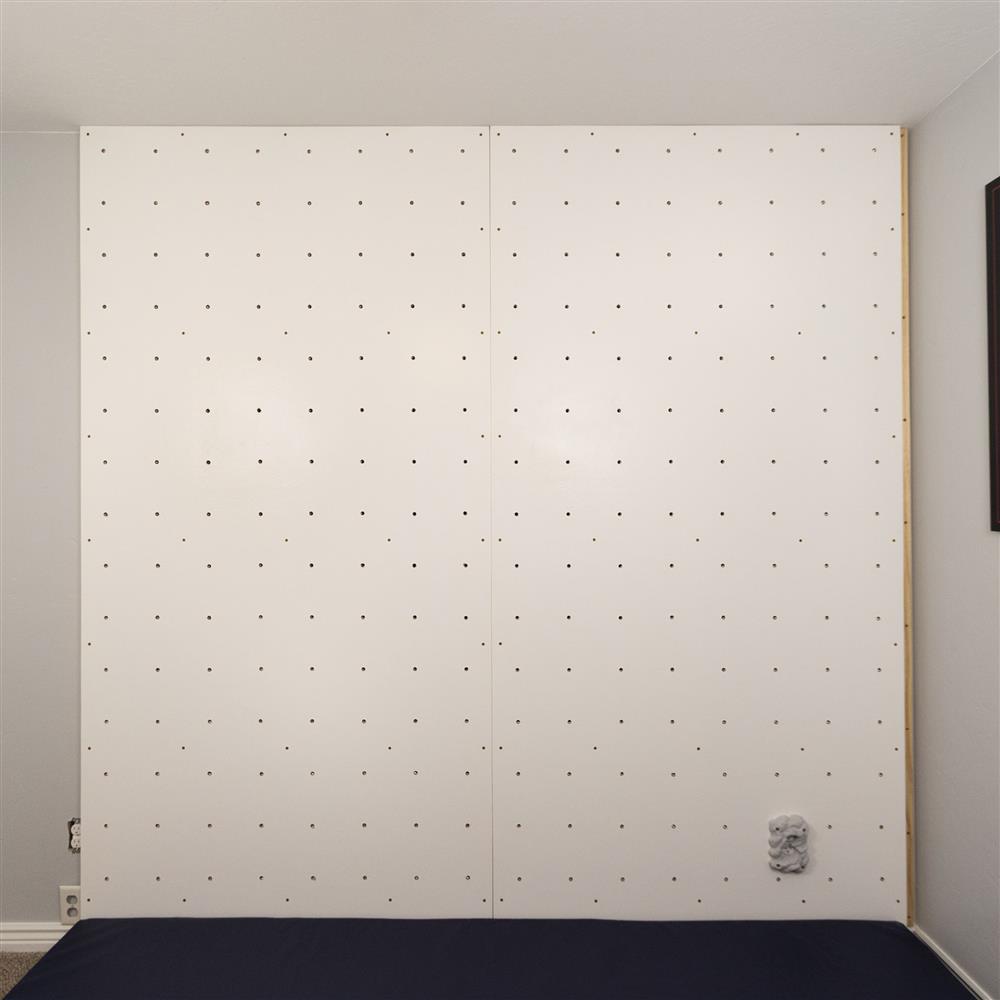
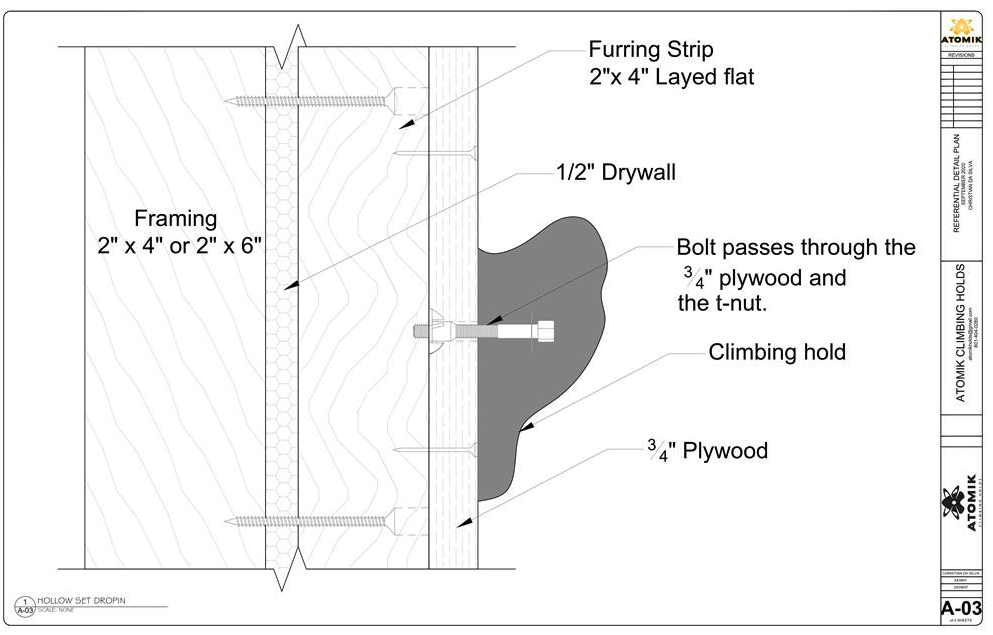
A Furring Strip is a piece of wood that protects your plywood panel from a flat surface. An example would be an interior room that has drywall. Since you cannot attach climbing holds directly on top of the drywall, you must introduce a 3/4" sheet of plywood. For climbing holds that connect with a 3/8" Allen Head Socket Cap Bolt and T-nut, the bolt must pass through the T-nut and often protrudes beyond the T-nut. The Furring Strip creates the space behind the plywood panel for the extra length of the bolt to pass.
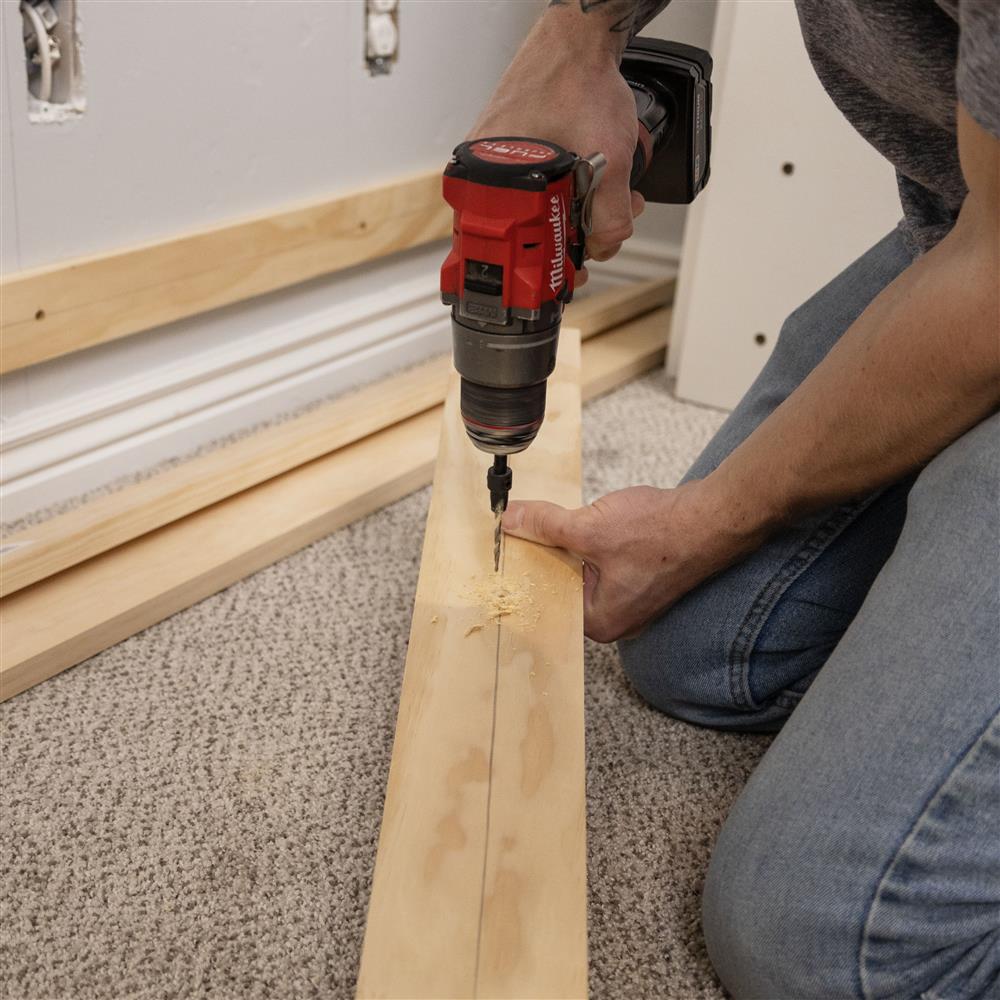
The minimum furring strip could be a 1 x 2, which is a nominal measurement. It measures 3/4" x 1-1/2". The issue with small furring strips of that size is splitting. Hence, the way we go about it is to use a #6 COUNTERSINK on the furring strips ensuring that the screw used passes through the furring strip, through the drywall, and a minimum of 1" into the wall stud. We use a #6 countersink so that we can get full purchase of the threads on the screw.


Orientation of the Furring Strips
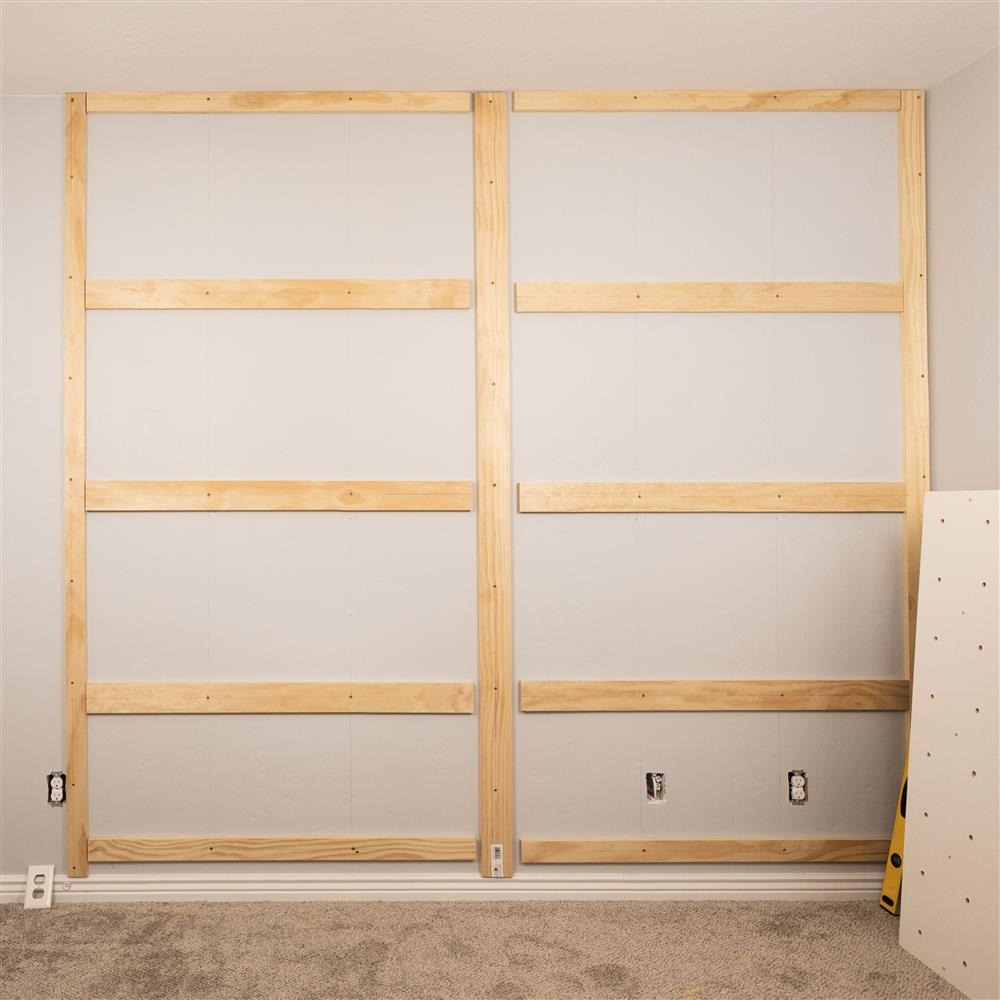
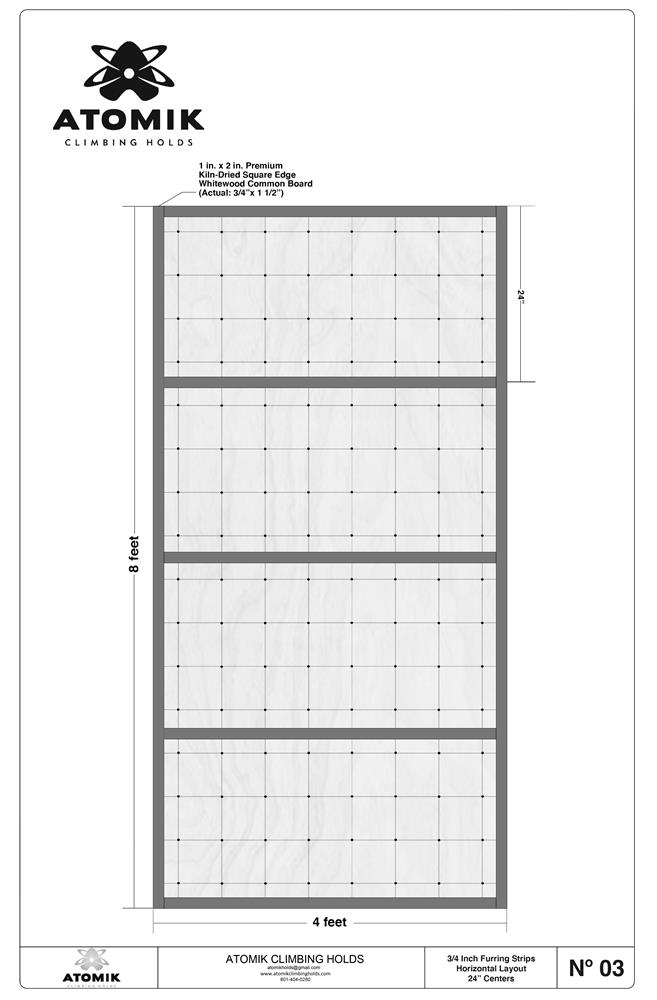
When attaching furring strips to a residential wall, it is easiest to run the furring strips horizontal so that you can land your attachment screws on as many of the studs in the wall as possible. If the sides and/or tops of the panels are exposed, we recommend capping those areas with furring strips to prevent hands from getting behind the panel.
24" HORIZONTALLY SPACED FURRING STRIPS (1"x2")
CLICK ME FOR THE 24" HORIZONTALLY SPACED FURRING STRIPS PDF
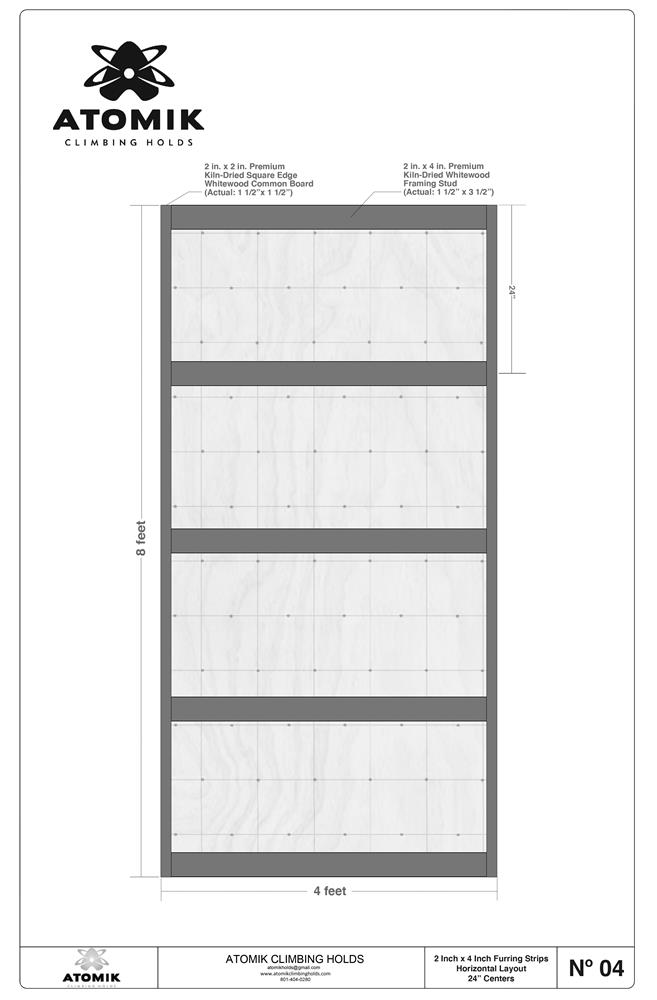
24" HORIZONTALLY SPACED FURRING STRIPS (2"x4")
CLICK ME FOR THE 24" HORIZONTALLY SPACED FURRING STRIPS PDF
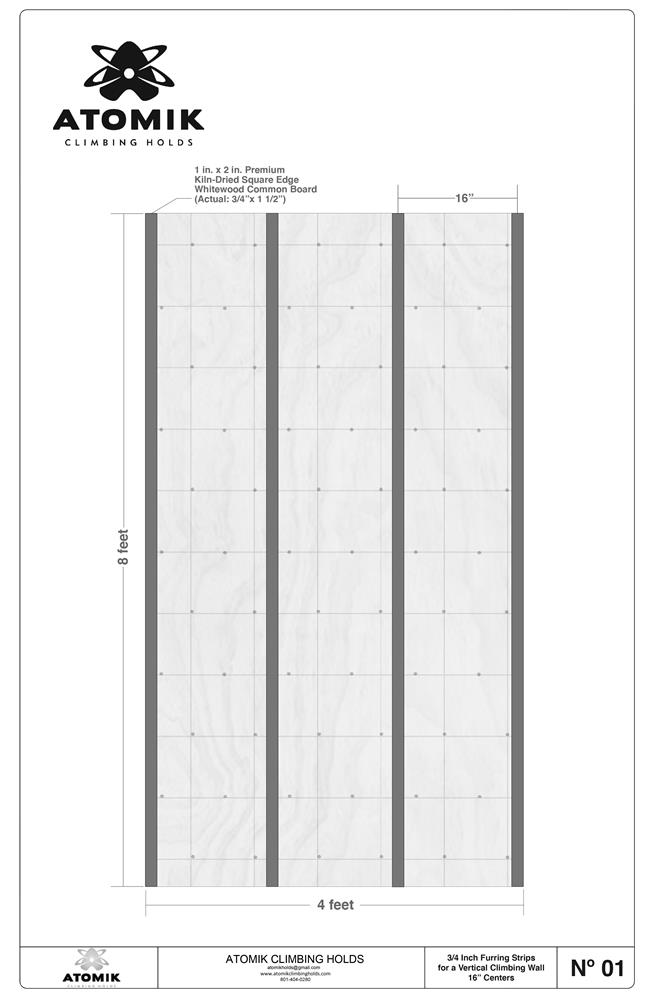
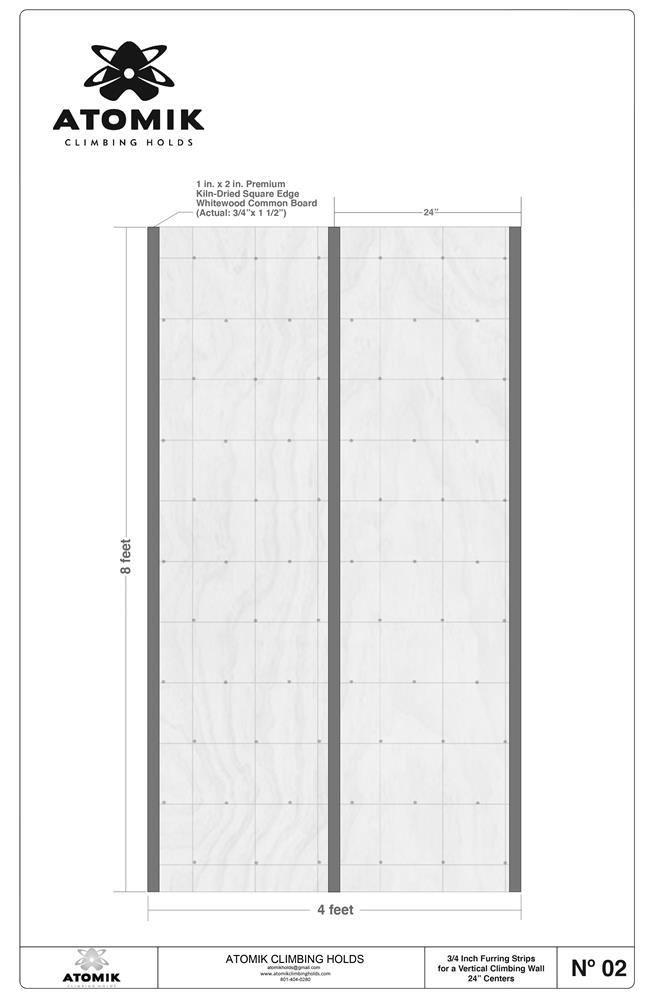
Horizontal is the preferred layout for furring strips in the climbing industry. However, vertical layouts are also possible.
16" VERTICALLY SPACED FURRING STRIPS (1"X2")
CLICK ME FOR THE 16" VERTICALLY SPACED FURRING STRIPS PDF
24" VERTICALLY SPACED FURRING STRIPS (1"X2")
CLICK ME FOR THE 24" VERTICALLY SPACED FURRING STRIPS PDF
55 East 600 South, Provo, Utah 84606
Tel. 801-404-0280
[email protected]