
If you have an at-home climbing wall, you know there’s nothing quite like training, experimenting, and growing as a climber in the comfort of your own space. But as you progress, your original setup might start to feel limited. Luckily, an upgrade is easier than you think! These hassle-free ways to expand your home climbing wall will help you conquer new skills.
Evaluate Your Current Wall Setup
Take a close look at your existing wall. What size are you working with? Is the structure made of sturdy materials like plywood and well-secured frames? Identify usability factors. Are there areas that feel underused or features that could enhance your climbing experience?
Pinpoint what works well to keep those elements intact. The similarities you transfer over will make the expanded portion feel more comfortable to climb.
At the same time, list areas where functionality could improve, such as underutilized corners or an awkward layout. This evaluation will serve as your baseline before you plan any upgrades.
Define Your Climbing Goals
What do you want to achieve with your home climbing wall? If you’re training for specific climbing styles, like overhangs, technical footwork, or endurance routes, your expansion should reflect those goals. For example, adding a vertical slab for balance work or a steep overhang for strength training could align with your objectives.
Consider your current skill level and the challenges you hope to tackle in the future. Your climbing wall should feel like an escape that allows you to get away from your problems and improve your climbing skills, one hold at a time.
Choose an Expansion Style That Suits Your Space
You need a direction that you’ll expand, whether it’s up, down, left, or right. Most climbing walls are vertical or horizontal, and when you expand them, it’ll determine where you can climb. Not all expansions need to be sprawling—make the most of a small space.
Vertical expansions are ideal for high ceilings and allow you to work on height and endurance climbs. Meanwhile, horizontal expansions create longer traversing opportunities or mimic outdoor cracks and overhangs.
Unusual setups like corner installations or ceiling extensions add fresh challenges while maximizing space. Remember, your wall can take advantage of every nook and cranny in your climbing area.
Selecting the Right Materials for a Durable Design
The materials used to create a climbing wall will determine its stability. Use high-quality plywood, such as birch or maple, with a thickness of at least 3/4 inches for durability and safety. Use zinc-coated T-nuts and screws to minimize rust and wear over time.
If you’re adding an overhang, go for heavier-grade materials to handle the additional load. Lightweight options also work for smaller extensions, but verify with our experts at Atomik Climbing Holds whether they will withstand regular routes and climbing pressure. Investing in solid materials upfront will increase your wall’s lifespan and reliability.
Prepping Your Expansion Area
Before hammering in bolts, make sure you prep your space for a seamless build. Clear the area of any obstructions and thoroughly clean the existing wall to make sure the new section connects smoothly. Use measuring tape to map out dimensions and mark where the supporting frames will go.
Double-check your measurements—ensuring accuracy now will save headaches later. Draft a sketch or even use wall-design software tools to visualize the changes before cutting or drilling. Proper prep lays the foundation for a hassle-free setup.
Safe Setup Tips
Safety is paramount when expanding your wall—it’s what turns a fun project into a long-term benefit that won’t pose you any risks. Make sure your wall frame is securely anchored to the floor, walls, or ceiling, depending on your design. Weight-test the frame multiple times before climbing to make sure it can handle load pressures.
Double-check that all T-nuts are secure and have evenly distributed weight across your surface area. Remember to inspect the wall regularly for any signs of weakening or malfunction. Safety precautions now mean fewer mishaps later.
Designing Routes That Push Your Limits
Your freshly expanded wall deserves routes that test your skills and keep climbing exciting. Incorporate routes that challenge balance, endurance, and dynamic movement. For example, include a dyno move to work on explosive power or a tricky slab section for technical mastery.
Variety ensures a well-rounded training regimen that’s tailored to different climbing scenarios. Include a healthy mix of moderate and difficult routes to really push yourself. It’s your chance to think creatively and level up.
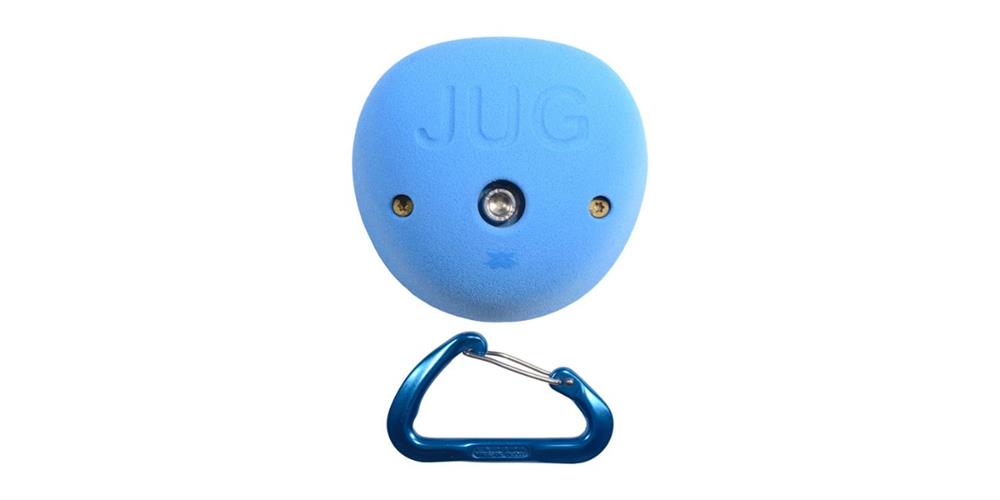
Creative Hold Placement for Maximum Versatility
Hold placement turns a simple wall into a diverse climbing playground. Combine different types of holds, like crimps, slopers, and jugs, to target various techniques and muscle groups. Rotating holds every few months also keeps your routes from feeling stale without breaking the bank.
Balance interchangeability and security with bolt-on climbing wall holds that attach and detach easily while supporting your weight as you climb. Experiment with spacing—you can implement closer holds for beginner routes and wider gaps for routes that build reach and flexibility. Versatile placement keeps your wall adaptable to your evolving skills.
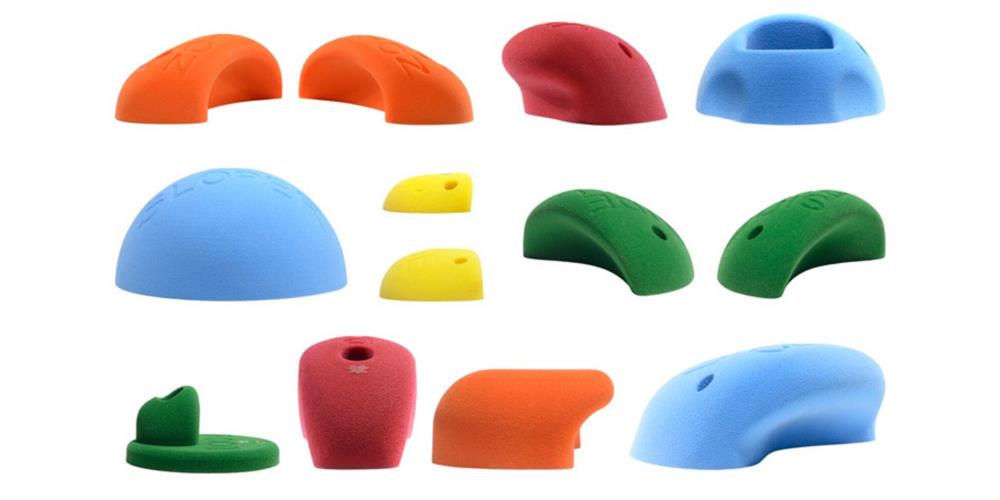
Installing Add-Ons for an Extra Challenge
Take your wall to the next level with add-ons that introduce exciting challenges. Volumes extend the surface area and create unique angles and features. Hangboards are perfect for building finger strength, while campus rungs improve explosive pulling power.
If you want to break out your tools for a DIY project, build some simple add-ons from leftover plywood or purchase pre-made options for quick installation. These extras make your climbing wall even more engaging and effective as a training tool.
Lighting and Aesthetics for Improved Climbing
Good lighting drastically enhances your climbing experience. Install adjustable LED lights to brighten your routes and reduce shadows. Spotlights strategically placed over challenging sections can highlight key moves.
Aesthetic touches like a painted mural, chalkboard routes, or themed decals give your wall personality. Combine design with function to make the space yours. Challenge yourself on your wall, but make sure you also enjoy every ounce of the experience and make it unique.
Regular Maintenance to Keep It Climber-Ready
An expanded wall requires maintenance for safety and longevity. Schedule routine checks for loose bolts, wear on T-nuts, and cracks in the material. Clean holds regularly using warm water and a brush to remove built-up chalk or grime, which can affect grip.
Inspect structural anchors and replace any compromised hardware immediately. By staying proactive, you’ll keep your wall safe and fun for years. Maintenance is the key to preserving the investment you’ve made in your climbing space.
Expanding your home climbing wall is an adventure in tailoring your space to meet your climbing goals. From choosing versatile materials and creating diverse routes to introducing innovative add-ons, every decision enhances your wall’s purpose and appeal. With careful planning and upkeep, your new setup will inspire years of skill-building and fun.
Leave your comment