Designing a home climbing wall can be a fun way to stay active, whether you're a veteran climber or a beginner looking to improve. To make the most of your space, you need to understand the dos and don’ts of designing a home climbing wall. From choosing the right holds to ensuring safety, thoughtful planning is key to creating a wall that’s both challenging and safe.
Let’s take a look at some of the key things to keep in mind when designing a climbing wall.
1. Assess Your Space
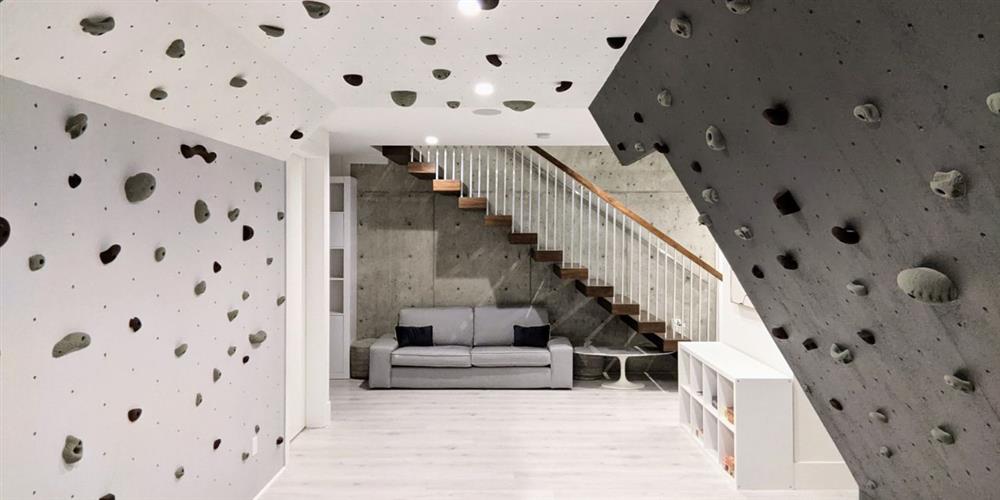
Do take a detailed look at where you’ll build a climbing wall. Measure the area carefully and account for ceiling height, wall structure, and floor clearance. If you're designing a bouldering wall, aim for a height between eight and twelve feet. Garages, basements, and home gyms are popular choices, especially when they offer open layouts and good ventilation.
Don’t assume any wall will work. Metal studs cannot safely support the combined load of climbing holds and human weight, posing a serious safety risk. Likewise, steer clear of cramped areas if you plan to include any overhangs or angled sections.
When assessing a space, consider ease of access, lighting, and any obstructions that could interfere with your routes. Make sure there’s room for proper padding underneath the climbing area, and adequate clearance to move comfortably around the wall. A well-chosen space sets the tone for both safety and long-term progression.
2. Select Holds Based on Skill Level
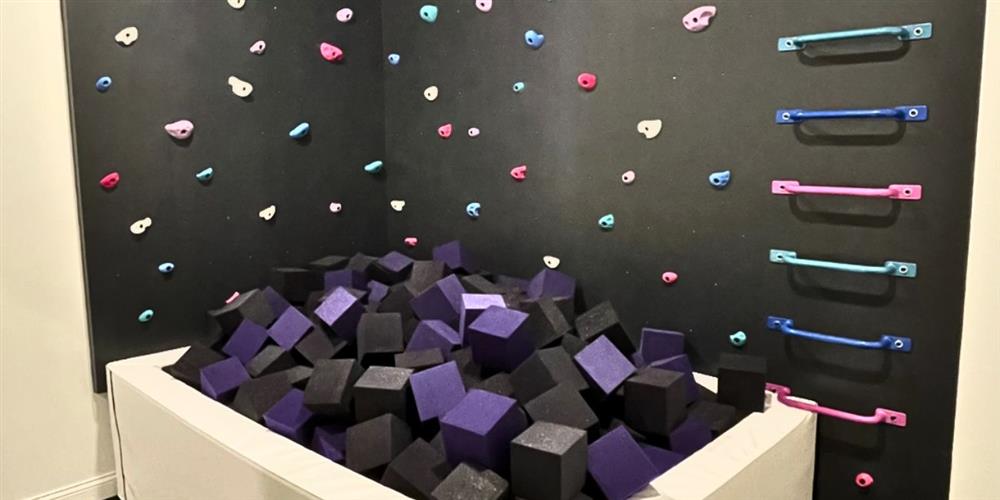
Do choose climbing holds that reflect your current abilities. If you’re new to climbing, start with large, easy-to-grip options such jugs and slopers. These holds offer a larger surface area for your hands, making it easier to build confidence while learning technique and movement.
As your skills progress, begin layering in more technical shapes such as pinches, pockets, and crimps. A pinch grip climbing hold, for instance, is an excellent mid-level option that builds hand strength while teaching control and body positioning. Advanced climbers may want to create intentionally sparse routes, integrate small footholds, or use directional holds to simulate more realistic climbing problems.
That said, don’t overload a wall with only difficult or advanced grips, such as small crimps or tiny footholds. That approach can quickly lead to frustration or injury, especially if you haven’t yet developed the finger strength or foot precision required for them.
Even on a small wall, strategic placement of holds, such as spacing them further apart or rotating them at different angles, can increase or decrease difficulty without needing to replace them entirely. A smart selection and layout keeps your wall engaging and accessible.
3. Plan for a Variety of Movements
Do design your wall to support a wide range of climbing styles and body movements. Incorporate vertical sections for balance and technique, slight overhangs for power and endurance, and, if space allows, a roof or steep incline to simulate more advanced problems. Vary the spacing and orientation of holds to encourage flagging, twisting, heel hooks, and dynamic moves.
Don’t stick to a single wall angle or layout. A flat, vertical wall with evenly spaced holds may become monotonous quickly and won’t provide the movement diversity needed to develop real skill or strength.
A dynamic wall should challenge your whole body, not just your grip. For example, wide foothold spacing can help develop flexibility, while closely placed holds can aid in developing precise footwork and core control.
If you’re building in a smaller space, minor changes in wall angle—just 10 to 15 degrees—can dramatically alter how a climb feels. Thinking ahead about movement will help you avoid designing a wall that feels stale after just a few sessions.
4. Use Quality Holds and Hardware
Do invest in durable, high-quality climbing holds and reliable mounting hardware. Holds made from non-toxic polyurethane offer a strong grip and long-term durability.
When installing, use steel bolts rated for climbing and attach them to T-nuts embedded in a thick plywood backboard; three-quarter-inch, high-grade plywood works best. This setup guarantees that the holds stay firmly in place, even with repeated impact.
Don’t cut corners with off-brand holds, flimsy screws, or makeshift mounting setups. Not only do they wear out quickly, but they also increase your risk of injury or damage to the wall.
Quality matters for more than just performance. Holds from reputable brands like Atomik Climbing Holds are rigorously tested for durability and carefully shaped to provide comfort and challenge. When used indoors and properly maintained, premium holds and hardware can last anywhere from seven to ten years.
For outdoor setups, expect a shorter lifespan of closer to three to five years, depending on temperature swings, sun exposure, and moisture.
5. Install Proper Safety Features
Do prioritize safety in every part of your wall’s design and setup. Use thick crash pads or bouldering mats beneath the climbing area to cushion falls, even if your wall isn’t very tall. Anchor your wall securely into wooden wall studs or a freestanding support system, and always use high-quality hardware rated for climbing.
Don’t attach holds directly to drywall or assume decorative walls can bear weight. Drywall has no load-bearing strength and will crumble under the force of a fall or dynamic movement, creating a major injury risk.
Think beyond the wall itself. Your climbing area should be clear of nearby furniture, low ceilings, or objects that could cause injury if you land on them. Additionally, install adequate lighting to illuminate holds and foot placements.
And if you’re building a wall for kids, consider slightly lower heights and extra padding to reduce the chance of injuries. Safety may not be the most exciting part of the build, but it’s the one that gives you the freedom to climb hard and confidently.
Build a Wall for Progression—and Enjoy the Process
Do design your wall with long-term progression in mind. Your routes should challenge you today, yet still leave room for improvement. Changing the wall angle, adjusting hold positions, or simply mixing up your sequences can refresh your setup without a full redesign. A thoughtful design not only keeps things fun, but it also helps improve strength, technique, and endurance over time.
Don’t rush the process or settle for shortcuts. Low-quality materials and poorly planned routes might save time, but they can lead to plateaus, safety issues, or costly rebuilds.
Now that you’ve learned the dos and don’ts of designing a home climbing wall, you’re ready to build a setup that fits your goals, your space, and your style. Atomik Climbing Holds offers USA-made climbing holds built for safety, durability, and progression. From versatile jugs and slopers to technical options such as the pinches, our lineup helps climbers of all levels build something that lasts.